How to Make Beats for Beginners: The Ultimate 2026 Guide | Buy Beats Now
Buy Beats Now Team / Updated Dec 27, 2025
Want to purchase music online but don’t know where to begin? Before you dive deeper into beat-making, make sure you know how to avoid the Top 5 Mistakes Artists Make When Buying Beats Online and avoid getting scammed or overcharged. This will ensure you are confident with your purchase while protecting your budget, your rights, and your music.
Getting Started
Beat-making is an immersive, creative journey that takes your limits to the next level. It’s way more than just meshing sounds together and creating something “new.” It’s about building emotions and telling a story through kick drums, snares, and melodies. Whether you’re exploring EDM, hip-hop, R&B, or experimenting with a new sound, music brings people together. Creating music allows you to take a simple melody or sound and design it into beautiful soundscapes that move people.
Making beats also sharpens your ear for rhythm, and it doesn’t take much to get started today. Most outsiders to music think that it takes an expensive studio and a lot of equipment to make an industry-loved track. That couldn’t be further from the truth. You’d be surprised to know that some of the biggest records in the world started with a small idea in someone’s bedroom. Let’s look at all the tools and equipment you might need to get started.
Essential Tools & Software
Before we dive into the software and other tools needed, the foundation of your producing career starts with a reliable computer. You might assume that making high-quality songs requires the latest and greatest hardware on the market, but that’s not entirely true.
DJ Zirk, who is a pioneer in creating what southern hip-hop sounds like today, got his start on a Boss DR-660 which is an old drum machine that helped create now-classic albums. This proves that you can still create hits no matter what computer or machine you’re using. Our equipment list is broken down into three essential categories: Needed, Optional, and Recommended. Now… let’s dive in!
1. Laptop or Computer – NEEDED
Apple MacBook Air (M1 or M2) [$600-$700]
- The M-series by Apple offers outstanding CPU performance and low-latency efficiency. The fanless (silent) design is ideal for beginners or mobile producers with moderate plugin usage. Depending what model you chose, you can store up to 2TB worth of data with a battery life of 18hrs. If money is tight, this is a great option for beginners who value a low price point and a professional, reliable system. SHOP DEAL: MacBook Air (Certified Refurbished) – BestBuy
ASUS ROG Zephyrus G14 / G16 [$1,300 – $2,200]
- The ROG Zephyrus G14/G16 series by ASUS balances power and portability seamlessly. This computer features a high-end Intel Core i9 or AMD Ryzen 9 processor that works perfectly for demanding music production tasks due to its exceptional multi-core performance. This laptop can sustain performance essential for low-latency recording when running multiple tracks and plugin-heavy sessions. SHOP CONFIGURATIONS: ASUS ROG Zephyrus – Official Store
Razer Razer Blade 18 [$2,500 – $4,000+]
- The Razer Blade 18 represents the absolute top-tier of mobile music production, built for professionals. If you’ve been producing music for a while, this is the computer for you. This powerful device features the latest Intel Core Ultra 9 HX-series CPU which is configurable with up to 96 GB of data. High RAM is essential when loading large, detailed instruments and sample libraries. SHOP PROFESSIONAL MODELS: Razer Blade 18 – Official Store
2. Headphones – RECOMMENDED
Sony MDR-7506 Headphones Professional Stereo Monitor Wired in Black [$100 – $120]
- The Sony MDR-7506’s are built like tanks. A true industry standard. Every professional studio has a pair, so everyone knows exactly how they sound. These headphones work for just about anything in the music scene, but their primary uses are tracking, monitoring, and field recording. Highly durable, the MDR-7506 boasts key features like a folding design for portability and a robust coiled cable. Customers consistently rate it highly, giving it 4.8 out of 5 stars (3,901 reviews). BUY NOW: Sony MDR-7506
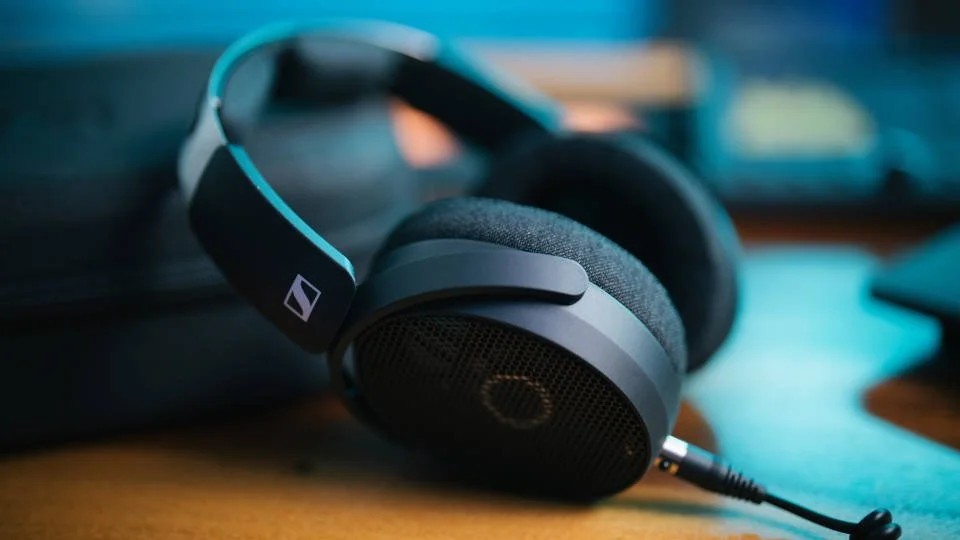
Sennheiser HD 490 PRO Studio Headphones [$350 – $370]
- The Sennheiser HD 490 PRO is a recent release, which explains why its review count is much smaller. But don’t let that fool you: this is a modern, premium open-back designed model that is made for mixing and mastering. The open design gives the sound a wider, more natural stage, and it comes with two different earpad sets. One set acts as the mixing earpads and the other for production. It is a pricer option, but it is looked at as top of the industry and comes with a lot of value. BUY NOW: Sennheiser HD 490 PRO
3. Digital Audio Workstation (DAW) – NEEDED
Fruity Loops Studio (Image-Line)
- FL Studio, or Fruity Loops, is immensely popular within the music industry, especially in genres like Hip-Hop and EDM. Some look at this DAW as the industry standard for rapid idea generation and professional sound design, used by many top producers. One thing that is unique about FL Studio is the different editions it offers. If you are short on money, no worries! FL Studio offers a free, fully functional version that unlocks everything the program has to offer. The only downside is that once you save a project, you cannot reopen it until you purchase a higher tier. I personally have the Producer Edition, which allows me to use essential features like audio recording for vocals directly in my tracks. I would recommend starting here. DOWNLOAD: FL Studio Free Trial & Editions – Image-Line
Logic Pro (Apple)
- Logic Pro is Apple’s professional Digital Audio Workstation and is available only on the macOS platform. It is widely used by professional producers, engineers, and composers.
In the music industry, Logic is often looked at as the standard for professional mixing, particularly for vocals; there’s hardly a studio session you’ll attend that doesn’t have Logic Pro running. Its native compatibility with Mac systems and deep integration within Apple’s digital ecosystem makes the DAW especially popular. Known for the vast sound library the daw offers, it is known for including high-quality virtual instruments, effects and loops. BUY NOW: Logic Pro on the Mac App Store – Apple
Building the Foundation
Your equipment is ready and your DAW is open, the fun has just begun. Learning how to translate the music (ideas) in your head into real tracks is the next step in your creative journey. Every professional track, from a simple drum sample to the most complex EDM arrangement, is built upon three core pillars. These pillars are non-negotiable: Rhythm and Groove, Drum Programming, and Melodic Structure. Mastering these fundamentals is the only way to ensure your track moves past a simple idea and into a beautiful finished product. Every artist has perfected this, now it’s time for you as well!
1. Rhythm, Groove and Timing
This is the backbone of your music. You can have the most amazing sounds, melodies, and drums, but if your timing and rhythm are off or don’t make sense, the entire track collapses. There’s no secret to why major songs blow up easily. Chances are, they have simple melodies that are easy to hum or sing. Great producers, from Metro Boomin to Kanye West, master rhythm before anything else. Groove is what moves people, and if you look around and everyone is bopping their head to your tune, chances are you’re doing something right.
The secret to a powerful rhythm is called Humanization. While you place notes in your DAW, the software will automatically stick the notes perfectly on the grid. We call this quantization. Real musicians rarely play notes exactly on beat. They will either not quantize the notes they just played or move the notes slightly off the grid. This gives your track even more character and energy. Once you can master this simple concept, I can promise your music will sound so much more interesting. It leaves the listener interested because the notes aren’t ‘perfect.
Defining Your Vibe
- Dial In Your Tempo: The BPM (beats per minute) of your track controls the entire emotion of the music. For example, the 90–110 BPM range is the sweet spot for classic, head-nodding Hip-Hop, while the 130–150 BPM range is common for today’s Trap music. Set your tempo with intention, because your rhythm depends on it.
- Experiment with Swing: Open your DAW and go to the swing or shuffle settings. Even a small 5–10% swing can turn stiff melodies into a groove fest. You would think that this small percentage change wouldn’t affect the track, but even that alone can change your entire song. Swing adds character, pocket filling, and movement instantly without doing too much.
- Master Off-Grid Movements: For a more professional-sounding bounce, try to intentionally move claps or hi-hats a few milliseconds early or late. This creates tension and room for other elements in your track. Some records have 10–12 different sounds playing at once, so moving your percussion hits just a little can free up a lot of space in your mix. In my personal experience, I use this technique on hats and claps. Although it seems minor, it is the key to achieving a professional sound.
2. Drum Programming Basics
Drums are the heartbeat and the pulse of your entire track. Mastering drum programming is more than just placing sounds on a grid, because anybody can do that. It means understanding how each drum element works, how they interact, and how to manipulate a sound to get it the way you want. A real producer creates groove, texture, and layers in sounds with precision. When you truly understand how drums interact with each other, you start designing rhythmic ecosystems in your tracks. This is the step where you take your predictable, basic beat and transform it into a professional sound that is uniquely yours.
The Kick Drum – PULSE, WEIGHT, DRIVE
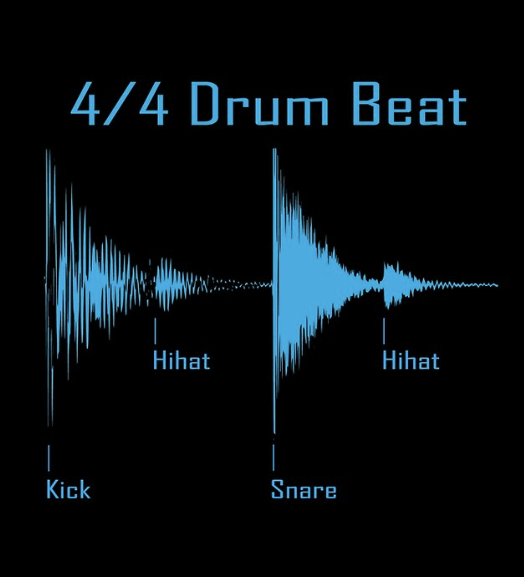
- This element might be the most important factor in your drum loop. The kick defines the track’s momentum. Whether you’re making a House beat with a simple four-on-the-floor rhythm or layering a kick under an 808 every other hit, the kick controls the low-end pocket in the EQ, setting emotional intensity. Choosing the right kick sample is crucial for the success of your sound. A kick with clean sub frequencies in the 30–60 Hz range adds a punchy transient to your record.
The Snare / Clap – IDENTITY & POCKET
- Your snare or clap acts as the defining element of the beat, or the attitude. It creates a rhythmic counter-punch opposite to the kick. These are typically placed firmly on the 2 and 4 beats in a 4/4 measure. A snare or clap can work in any scenario; it all just depends on the sound you are looking for. House beats are known for their big-room claps, while Detroit-styled Trap beats often use thin rimshots or tight snares to add a sharper feel. A method I personally like to use with my snares and claps is to pan them around 15–20% left or right, giving it a more wide feel and opening space in the mix.
Hi-Hats – MOVEMENT & GROOVE
- Hi-Hats are not background filler, but a main vocal point in your beat. Hats set the pace by creating movement through rolls, stutters, and dynamics. In Trap music, it is very common to place two-step hats and call it a day, but there are endless ways to create unique hi-hat patterns. Advanced producers lean heavily into placing hats off the grid, pitching hats up/down, and randomizing the velocity of notes. Top producer Lil 88 is known for his triplet hi-hats, which, before him, was not very common in Trap music. Hi-hats can be the make-or-break element in determining whether your track feels alive or falls flat on its face.
3. Melodic Structure
A strong melody creates an emotional connection with the listener. To an outsider, melodies just sound like a bunch of bells, plucks, pianos, and leads all meshed together to create an atmosphere. You might think you need incredible musical talent or to be a trained pianist to write a great melody, but that is far from the truth. The key is to simply stay in the right key. As long as you do that, the melody will sound good. It takes some tweaking and adjusting to make it sound perfect, but you don’t need crazy skill to write a compelling melody.
Chords – EMOTION AND ATMOSPHERE
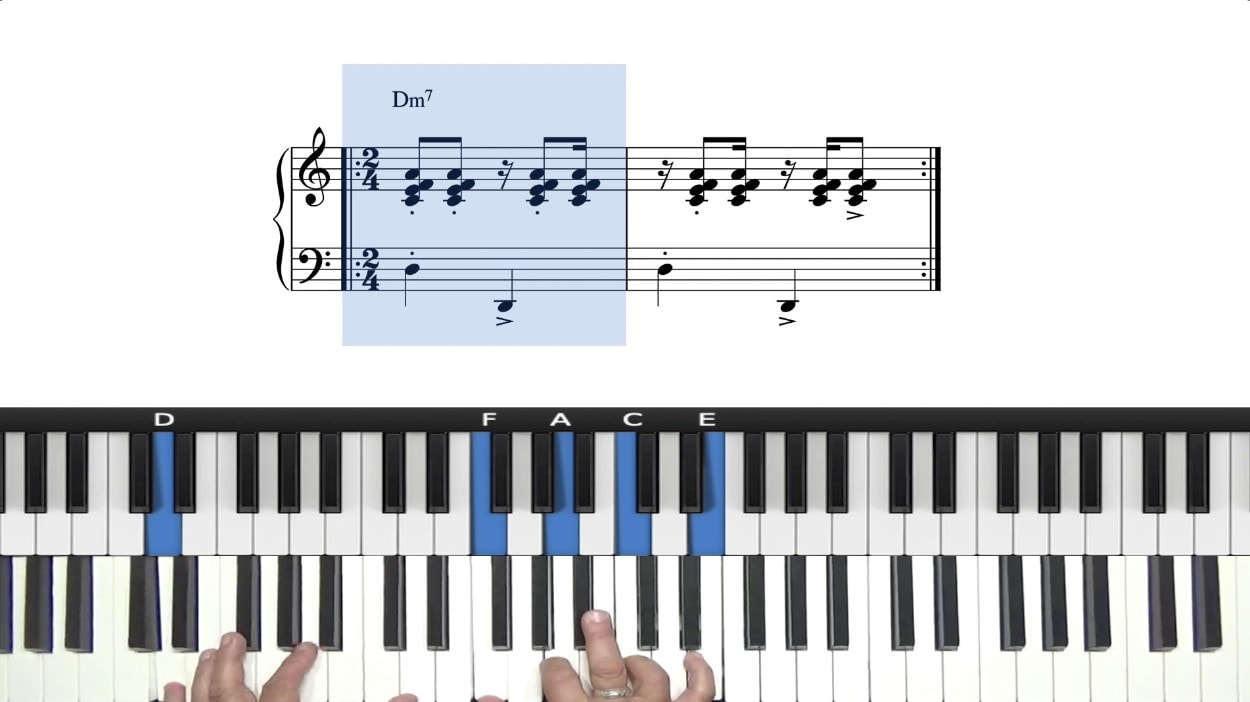
- A chord is simple. Chords are clusters of three or more notes played simultaneously that define the emotional direction of the track. They give your top melody a solid foundation to sit on by setting the mood (happy, sad, or tense) depending on the chord type. For example, Major and Minor scales are the most common in music: Major chords are usually uplifting and hopeful, while minor chords sound more emotional and darker.
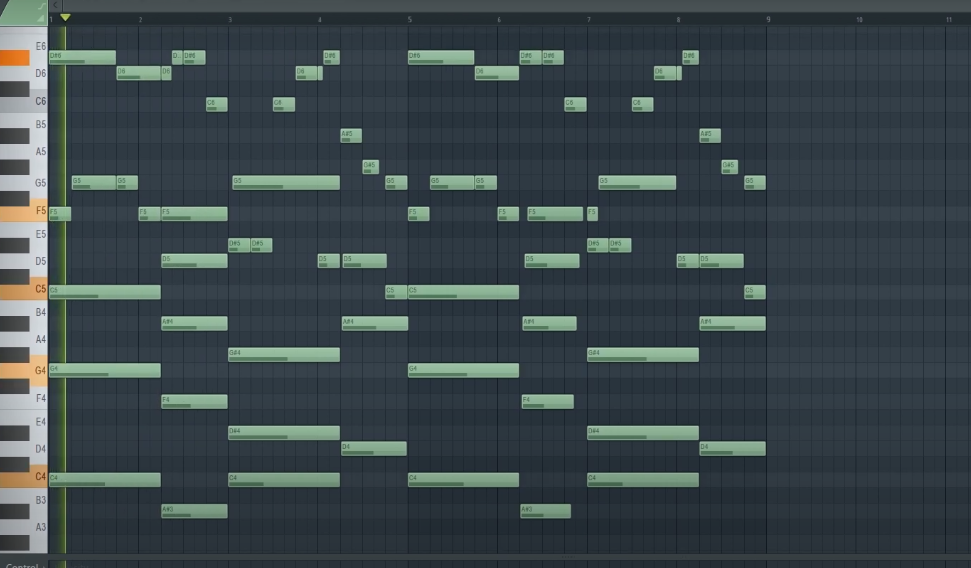
- Chord progressions are the narrative structure of your beat. A chord progression is simply the order in which your chords play… but the order is important for the success of your sound. This structure is crucial because your bassline (808) will follow the progression, and it supports the entire organization of your song (verse, chorus, hook).
Melody – SIGNATURE & HOOK
- The melody is the most memorable part of any song. A great melody shouldn’t take much effort to create, and it should also not be too complicated. A simple melody sticks with people—it’s the part they whistle or hum. Some of the biggest and best songs right now have simple, repetative melodies that are easy to remember.
- Complicated beats rarely get placed on albums for good reason: the artist cannot catch a flow. Artists write lyrics from how they are feeling from the melody. If a melody is too complex or busy, the listener will have a hard time remembering it, and the only thing left to save it is the drums. The drums should enhance the melody, not be the only part that makes the song good. My biggest advice would be to start a melody with a very simple idea, and over time, add more texture to give that simple foundation a professional finish.
Structuring Your Beat
You’ve set up your equipment, opened your DAW, and built the core ingredients for your track. Now it’s time to put it all together in a way that makes sense for the listener. It’s easy to make a cool four-bar loop, but it separates good producers from the great ones when you take that small idea into a full listening experience.
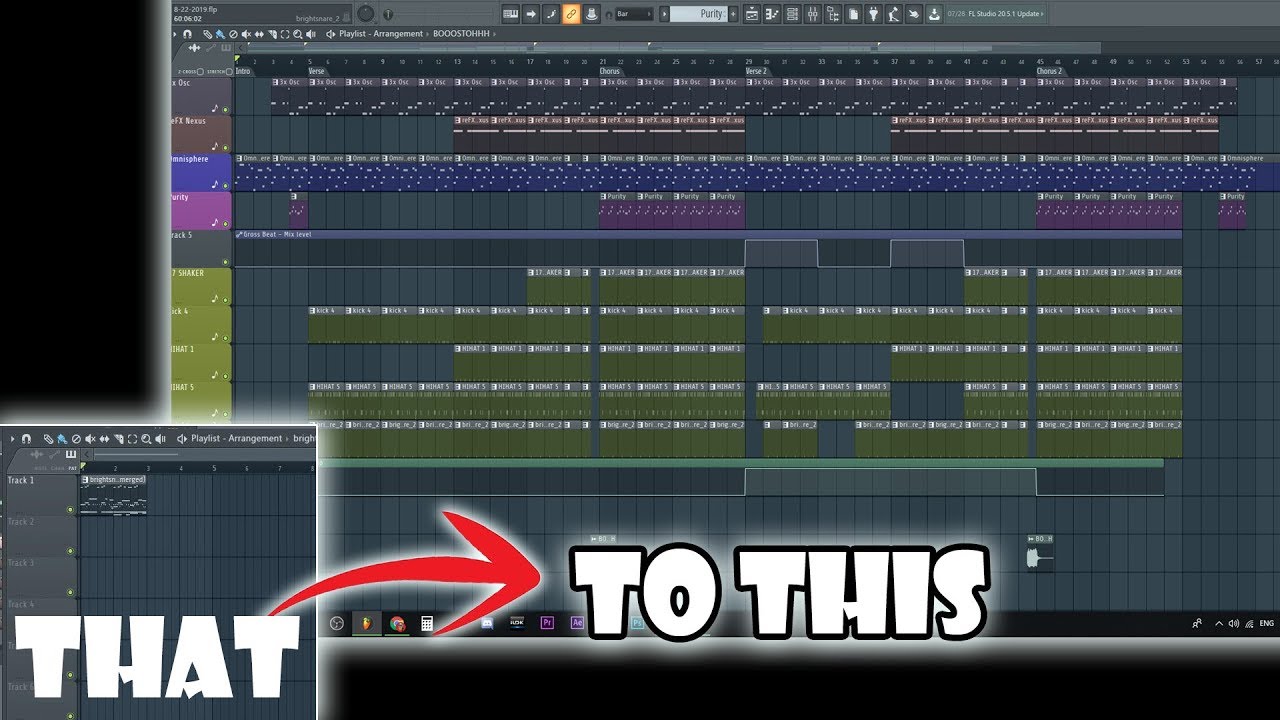
Professional arrangement is about delivering energy and storytelling. You’re essentially telling a story through a beat, complete with peaks, drops, transitions, and outros. Instead of having all the sounds playing at once, you are carefully crafting when a sound is introduced and when it leaves. Great producers arrange tracks with purpose.
1. The Foundation of Arrangement
Every beat arrangement is different, but most follow the same core structure. Take a pop song for example: the most common song structure is the “Verse-Chorus-Verse-Chorus-Bridge-Chorus model.” There is a reason why it is replicated over and over again in thousands of songs… because it works. Most artists aren’t trying to rewrite the wheel; they are trying to achieve the most streams and potentially secure radio time.
But then you raise the question: Why are all these songs structured the same, yet all sound different? The answer lies in subtle movement within the tracks. To the average listener, they might not realize that the spacey guitar in the background of a song fades away during the verse. But that subtle movement is exactly what keeps them excited. Switching hi-hat patterns during the chorus, for example, keeps the listener engaged—and that is the ultimate goal of beat arrangement: to make a cool track that is never boring and constantly keeps the listener engaged.
2. Using Transitions to Glue Sections Together
You have probably heard transitions in songs before but have never noticed them. In genres like EDM, transitions are the vocal point of the track. But in most songs, risers and downlifters are tucked in the back of the mix. They build anticipation for the hook and reset energy after the chorus without you even realizing it. They are simple to implement and can make the big difference in your song. For example, if you were making a Trap beat and wanted a clear separation between the hook and verse, adding a crash cymbal or snare rolls before the drop can help with that separation.
Mixing Your First Beat (DEEP DIVE)
DAW is open, equipment is set, melody is written, drums are throbbing, and the beat is fully structured. So now what?
The next step in the beat-making process is the mixing stage. Mixing is the art and science of balancing, blending, and meshing all the sounds together. This essentially involves taking each individual element, such as drums, vocals, bass, and melodies, and polishing them into one cohesive, professional-sounding file. The ultimate goal of mixing is to ensure the song sounds as good as possible on any given sound system, from high-end studio monitors to ear buds.
Think of it this way: The arrangement of the beat is the blueprint of the song. There is a clear spot for the artist to lay down a verse or two and a hook. When you get to mixing the beat, it’s more like the construction phase. You are carefully trying to get all the pieces to fit nicely together in this complex song. The mastering stage is the final coat of paint. In mastering, you are primarily trying to make the track as loud as possible without passing 0 dB to prepare it for distribution.
We have broken the entire mixing process into bite sized pieces that are easy to understand for anyone. By focusing on these individual steps, you can tackle the mixing process with ease.
1. Gain Staging (Level Balancing)
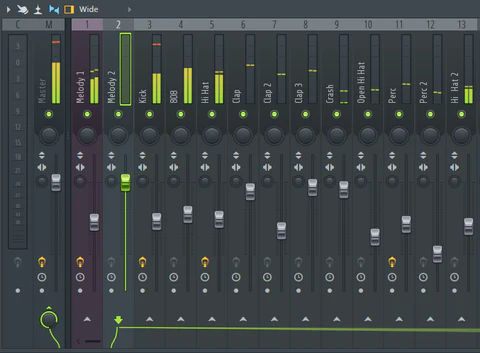
Gain staging manages volume levels throughout the mixer channel to optimize clarity. It prevents distortion, keeps your mixes clean, and helps you hear the real balance of your track. The last thing you want is a kick drum that is way too loud or a clap that’s too quiet.
Remember this easy rule: If something sounds too loud, turn it down. If something sounds too quiet, turn it up. There is no precise science behind it—trust your ears as your primary guide.
2. Equalization (EQ) for Beginners
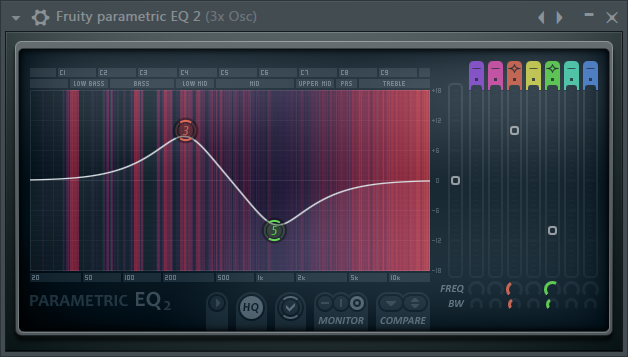
Look at equalization (EQ) like your carving tool. An EQ allows you to get rid of unwanted or muddy frequencies and enhance the important ones. The simplest way to understand an EQ is this: take away or turn down what sounds bad, and slowly turn up what sounds important to the beat.
It is crucial to use a high-pass filter (often called a low-cut) to remove any unnecessary low-end from everything except the kick and 808. The reason for this is to prevent lower frequencies from clashing with the 808; you want the cleanest possible sub-bass sound. On the master track, it is recommended that you add an EQ and remove all the “rumble” below 30–40 Hz. Your ear cannot clearly hear these frequencies, but removing them helps reduce overall muddiness and wasted headroom in your mix.
But how much are you supposed to boost and take away? My rule of thumb is never do too much on the EQ. If a track sounds good, leave it alone. Boosting highs is great for adding clarity and air to drum sounds like hi-hats or to vocals. If you want a fuller track, boost low ends. Remember, it is always better to cut problematic frequencies from a sound rather than blindly boosting everything.
3. Compression
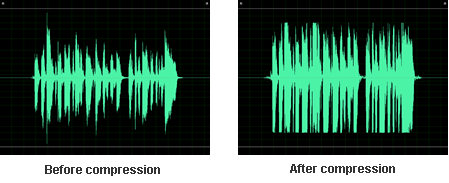
Compression is probably the hardest component to understand. It’s basically an automatic volume knob that controls dynamics. Instead of having random spikes in a sound, a compressor essentially makes loud parts quieter and quiet parts louder, creating a more full sound. Compression is great for adding weight to a sound, gluing sounds together, making vocals more consistent, and making drums hit harder (punchier).
Here is something easy to remember when it comes to compression: Loud parts get turned down a bit so everything feels tighter and smoother. You should be compressing drums such as kicks, snares, 808s, and lightly compressing the mix bus. The attack knob controls how fast the compressor starts reducing volume after a sound goes over the threshold, and the ratio knob determines how hard to squeeze the sound.
4. Reverb & Delay
These two effects are how you give your track more depth. Adding reverb and delay is important because it leaves your mix feeling larger rather than flat or dry.
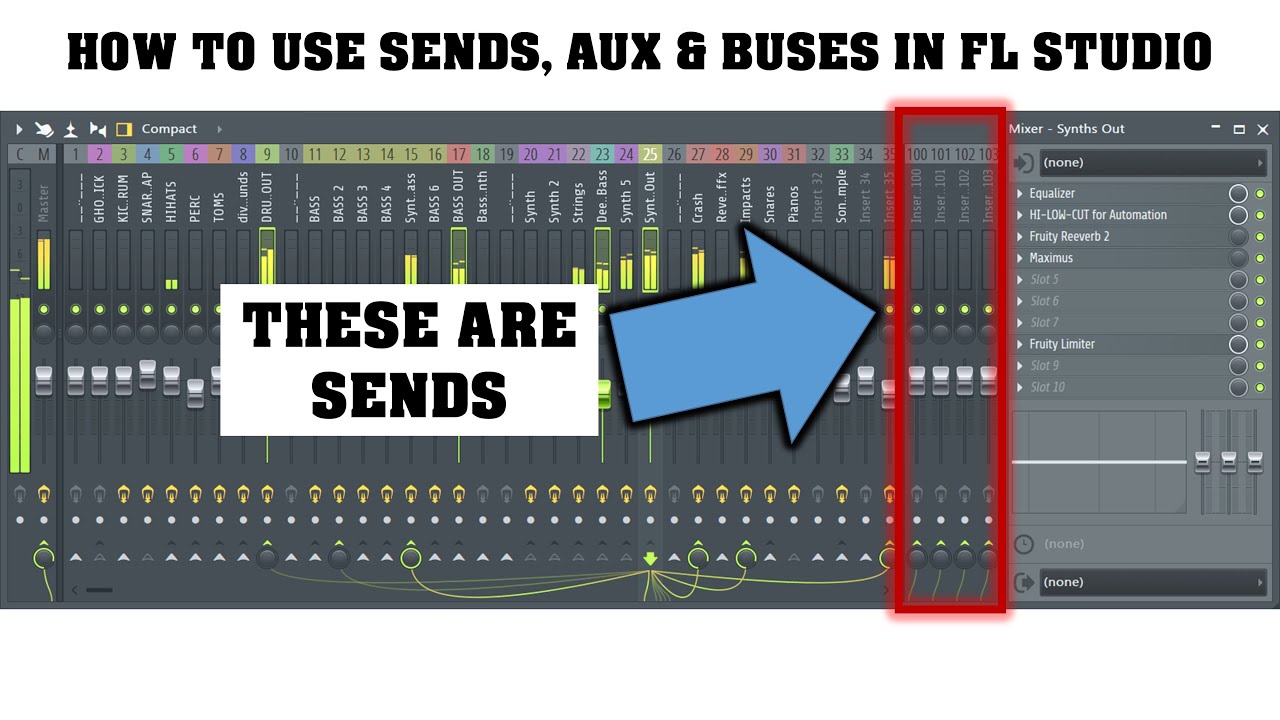
Think of reverb like space. Adding reverb to a sound makes it feel like you’re in a big room or hall. You have to be careful using reverb because too much can leave your mix feeling more muddy than before. My biggest advice is to NEVER put reverb directly onto a track. ALWAYS use a send track. Sending multiple tracks to one reverb bus makes all the elements sound like they were recorded in the same room.
On the other hand, think of Delay like an echo. It repeats the sound to create rhythm, width, and/or ambiance. When using delay, use short, stereo delays on vocals or leads. This ensures that the audio sounds incredibly wide without interfering with the sounds in the center of the mix (drums and bass).
5. Cleaning Muddy Mixes
So far in the mixing process, you’ve learned what mixing is, how to gain stage (level balance) your individual tracks, what equalization (EQ) is, and the basics of compression and delay + reverb. It seems like a lot, but you’re only two steps away from having a clean mix.
We briefly touched base on cleaning up the muddiness in your beat in the EQ section, so there isn’t much left to cover. Mud happens when there are too many sounds fighting in the low and low-mid range of your frequency spectrum.
A couple of important things to note:
-
Always add a high-pass filter (low-cut) to get rid of unnecessary low-end from your vocals, pads, and anything that is not an 808 or kick drum.
-
You should strive to have only one or two instruments that are truly present in the low-end. Anything more will cause that muddy sound we have been talking about.
I strongly recommend is this: Cut everything below 30–40 Hz on your master channel (rumble), and remember that not every instrument needs bass. Choose one element that dominates the low end, and stick with that.
6. Mix Bus Tips
If you’ve made it this far, pat yourself on the back! You’ve made it to the final step in the mixing process. There’s a lot more that we didn’t cover, but again, this guide is for beginners.
The Mix Bus (or Master Bus) is the final channel in your DAW’s mixer. Every single sound in your project gets routed through this input—call it the destination for your entire mix. Don’t overthink it. Keep it simple by adding:
-
Light Compression: Aim for a very subtle 1–2 dB of gain reduction to “glue” the tracks together.
-
Gentle EQ: Use it for brightening the high end and clearing up any remaining muddiness in the mix.
IMPORTANT: At the very end, add a Limiter, which will limit the sound of your entire track. If you set the limiter to 0 dB, your track cannot go past that level. Do not over-compress, do not over-EQ, and do not smash your mix trying to make it louder. You got all the way to this step, so there’s no reason to mess it all up now!
Level Up Your Producer Skills
This final section moves beyond the technical aspects of arrangement and mixing to focus on efficiency and continuous improvement. Here, you will find practical tips for optimizing your studio workflow, identifying and correcting common production mistakes, and the best resources for expanding your knowledge to ensure a long and successful career in music production.
The 80/20 Rule (Pareto Principle): Remember that 20% of your effort yields 80% of your results. In production, this means spending the majority of your time perfecting the fundamentals—the sound selection, the rhythm, and the gain staging. Don’t waste hours on tiny, almost inaudible EQ cuts or chasing an unnecessary effect that people won’t hear. Focus on the elements that truly define the song.
1. Workflow Tips: Create More Beats, Faster
The secret to speed isn’t working harder; it’s being more organized and eliminating repetitive tasks.
-
Templates are Everything: Start every session with a template that is pre-loaded with your favorite sounds, basic drum patterns, and essential mixer tracks (like a Kick channel with a compressor ready, or a Reverb Send track). This skips the 10–15 minutes of setup time and gets you straight into creating.
-
Establish a Routine: Decide on a fixed creative phase and a fixed mixing phase. For example, when producing music, I like to use this exercise: set a timer and make a beat in 20 minutes. Save it, and don’t think about it. Then, repeat that process over and over again. The next day, or even a week later, come back to that idea, create a new copy of the beat, and perfect it.
-
Sound Selection First: Don’t start programming drums until you’ve found the perfect kick and snare. Sourcing high-quality sounds you love upfront saves hours of tweaking a bad sound later. You can find great drum kits and sounds on sites like Reddit or in dedicated Discord channels.
2. Common Mistakes to Avoid
A producer’s biggest time sinks often come from making common mixing errors that require tedious correction later.
-
The Louder is Better Trap: Do not mix loudly! Your ears fatigue quickly, and music sounds better when it’s louder, which tricks you into thinking your mix is better than it is. Mix at a moderate volume so you can hear subtle details and work longer. After your track is complete, then you can master it to make the beat louder.
-
Over-Compression/Over-Limiting: A common mistake is over-compression or over-limiting. Beginner mastering often results in tracks that are too aggressively limited, causing the song to sound squashed, lifeless, and distorted. To avoid this, leave at least -6 dBFS of headroom in your mix bus, and only use a limiter gently in the mastering stage.
3. Best Educational Sources for Learning
-
YouTube Tutorials: Search specifically for “producer breakdowns” where top industry engineers dissect how a specific hit song was produced and mixed. I highly recommend producers like Nick Mira, whose content inspired me to start making beats—he drops a lot of “sauce” (invaluable tips) in his videos. Videos from TRiFREEZE and Cxdy are also great for learning modern techniques and workflow.
-
Audio Engineering/Mixing Courses: Reputable online platforms (like MixWithTheMasters, Udemy, or Berklee Online) offer structured courses that dive deep into the physics of sound and advanced mixing techniques (like parallel compression and automation).
- Feedback and Collaboration: Join online forums or local producer communities. Getting honest, critical feedback on your finished tracks is absolutely essential, as it will highlight weaknesses in your arrangement and mixing that you can’t hear yourself. After listening to a track hundreds of times, your ears develop ‘producer blindness’ and simply ignore flaws. Collaboration is also a vital tool; working with another producer or artist brings fresh ideas to the table, helping you break through creative walls and learn new techniques quickly.
